The direct answer
List and measure what the kitchen must store, group it by activity and access frequency, then assign each group to a cabinet with verified usable dimensions. Test drawer depth, shelf spacing, door movement, hardware, appliance clearances and service access before fabrication drawings are approved. Storage planning should begin with pans, plates, pantry goods and small appliances—not with a catalogue of accessories. A cabinet can look generous on an elevation while hinges, drawer runners, plumbing or an appliance void reduce the space that is actually usable.
Make a practical inventory
Empty one category at a time and record quantity, largest dimension, weight where relevant, frequency of use and whether the item is likely to grow. Separate everyday, weekly, occasional and seldom-used pieces. Include food containers, cleaning supplies, recycling, pet items and countertop appliances that owners often forget. Photograph groups for the designer without capturing private labels if the images may be shared. The goal is not a perfect household audit; it is enough measured evidence to stop generic cabinet assumptions.
Group storage around kitchen activities
Map consumables near unpacking and preparation, cookware near cooking, crockery near serving or dishwasher unloading, and cleaning items around the sink where safe and suitable. The shortest route is not the only test: consider two people working, open doors and hot or fragile items. Manufacturer Blum describes zone planning and cabinet applications as ways to organize storage and access, but any branded solution must be selected for the project's dimensions, loads and local availability rather than copied as a universal answer.
Design to usable internal dimensions
Ask fabrication drawings to state clear internal width, depth and height after doors, hinges, runners, backs, service voids and structural components are included. Measure the tallest bottle, widest tray, largest pot and appliance that must fit. Check whether a shelf can be removed or adjusted after installation. Deep drawers can make heavy cookware visible and reachable, while shelves may suit lighter or infrequently used items; the right choice depends on contents, hardware capacity and user preference.
Treat corners and tall units honestly
A corner mechanism may improve access, but it also occupies volume and introduces moving parts. Compare it with a blind corner, drawers, an alternative layout or accepting a less-accessible zone for occasional items. For tall pantry cabinets, test shelf or drawer access at each height and keep heavy items within a comfortable and manufacturer-supported range. Do not count unreachable top space as equivalent to everyday storage. Record fillers and door clearances so handles and adjacent fronts do not collide.
Planning example
Consider a planning example, not a completed project. A couple's inventory includes six large pans, a stand mixer, bulk dry goods, many shallow spice jars and serving platters used monthly. The first cabinet elevation provides equal shelves and a narrow drawer stack. The inventory study creates deep cooking drawers beside the hob, a reinforced mixer position with lift-free access, shallow visible spice storage away from heat, adjustable pantry pull-outs and a vertical platter section near serving. A rarely used corner becomes seasonal storage. The facade changes very little, but daily items stop competing for the same undivided shelves.
Coordinate sinks, appliances and services
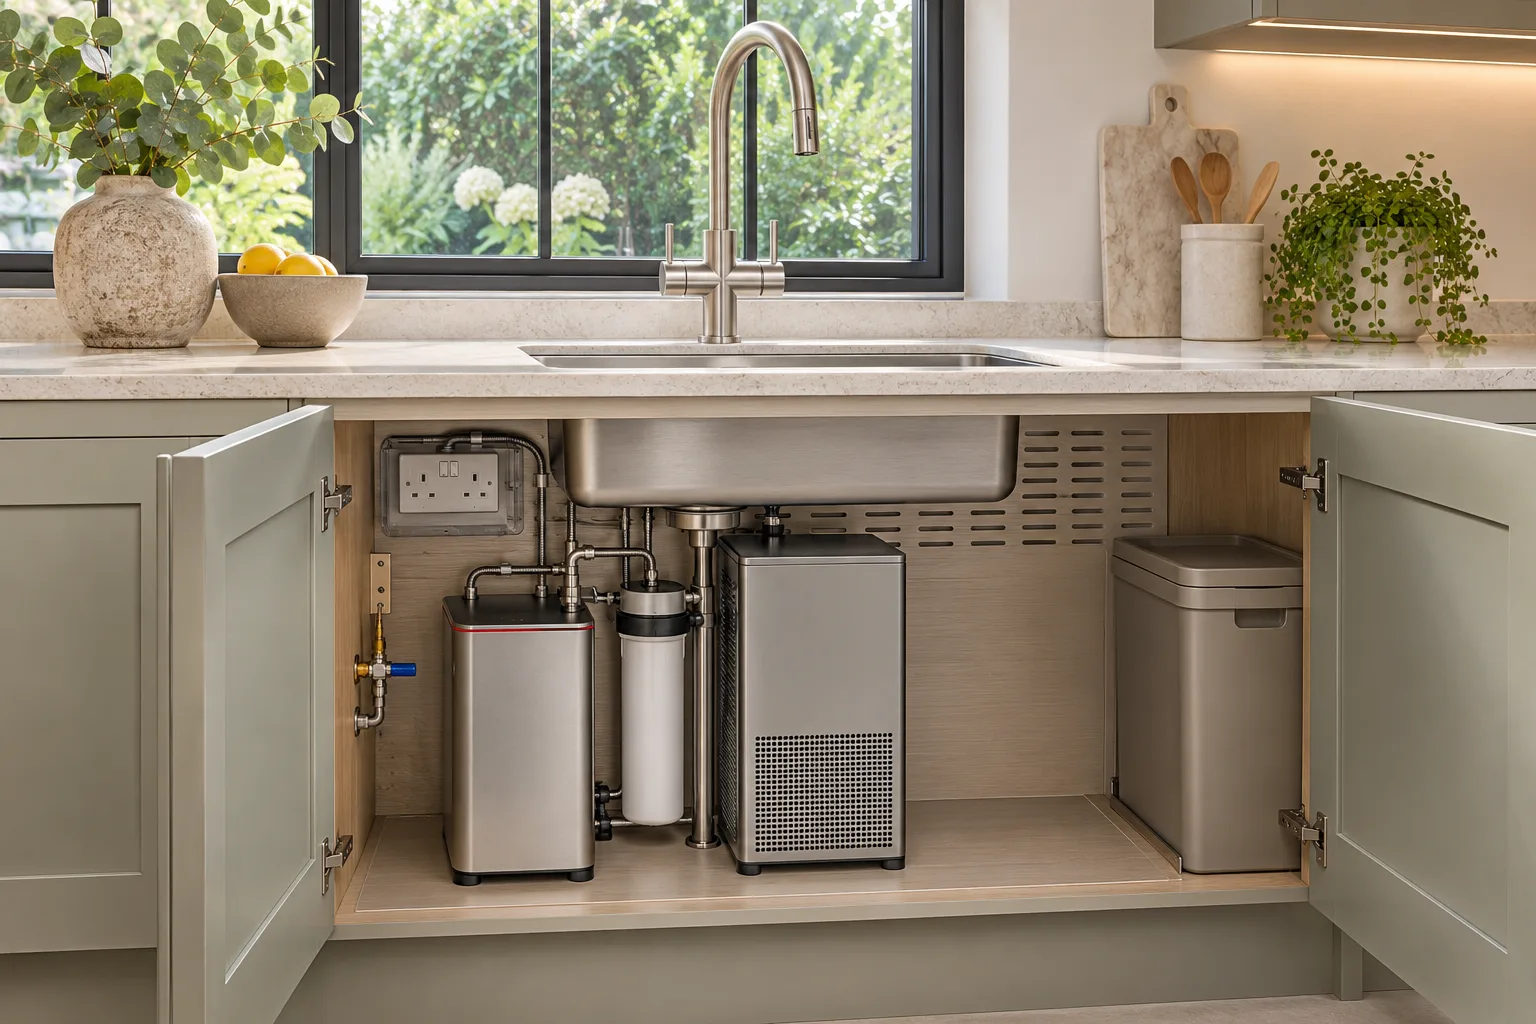
Under-sink storage must reflect the actual sink bowl, waste, water, filtration and other approved components, with access for inspection and maintenance. Tall units must coordinate appliance ventilation, doors, fixings, plugs and removal routes. Do not conceal isolation points or equipment behind a fixed accessory. Replace generic appliance blocks with current selected-model data, and have qualified specialists resolve electrical, water, gas or ventilation requirements. Interior organizers should be the final layer around these constraints, not a reason to compromise them.
Specify hardware and cleaning
Record the proposed hinge, runner, lift or organizer with its load basis, opening angle, soft-close behavior where selected, finish and maintenance needs. Confirm local supply and future replaceability rather than presenting any brand as a partnership. Test whether crumbs, spills and dust can be removed from corners and channels. A complicated insert that fits today's utensil set exactly may become wasteful when items change, so use adjustable dividers where flexibility matters. Review one representative internal sample with the chosen carcass and edge finish before full manufacture.
Cabinet-interior approval checklist
Review the inventory schedule beside the final elevations and selected hardware before fabrication release.
- Item groups, quantities and largest dimensions recorded
- Everyday, weekly and occasional access priorities
- Clear internal dimensions after hardware and service voids
- Drawer, shelf and mechanism load assumptions
- Appliance, sink, plumbing and ventilation coordination
- Doors, drawers and adjacent handles shown open
- Corner and tall-unit access tested
- Cleaning, adjustment and future replacement considered
- Finish, edge and representative internal sample approved
- Each cabinet labelled to its storage group on the drawings
Limitations and manufacturer information
An inventory establishes requirements; it does not engineer cabinetry. The fabricator and hardware supplier must confirm spans, loads, fixings, clearances and compatibility for the chosen system. Product ranges and availability change, so current local technical information should be checked before approval. The project team should also confirm relevant building, fire, electrical, gas and ventilation requirements for the actual renovation. Do not adapt cabinets around live services or heavy equipment without competent design and installation.
The useful next step
Create a cabinet schedule with one row per unit: intended contents, largest item, clear internal dimensions, shelf or drawer arrangement, selected hardware, service constraints and unresolved decision. Lay the inventory photographs beside the relevant elevations and review the sequence from unpacking to preparation, cooking, serving and cleaning. Then mark each row approved, allowance or unresolved. Fabrication should start only when unresolved items that affect dimensions, loads or services are closed. This turns storage from a promise of plenty into a checkable part of the kitchen design.
Sources & further reading
Make this useful for your project.
A review of your property and priorities can turn general guidance into a defined brief.
Explore our servicesDiscuss your project